


by Spencer Grey
Dab rigs do wonders for lovers of cannabis concentrate—but they also have a tendency to get real dirty, real fast. Since a dirty dab rig is pretty much inevitable, you’ve got to know how to clean it properly as well as prevent the worst of the buildup from happening in the first place. With these goals in mind, here’s a short and sweet guide to keeping your dab rig sparkling.
What’s in That Gunk?
When you dab, your goal is to vaporize THC and other desirable cannabinoids for inhalation. The optimal temperature for vaporization is about 350-400°F. Some people go so far as to invest in infrared thermometers to make sure they’re hitting the sweet spot, but for most of us it’s a guesstimation game.
If you dab at too high a temperature, you’re simply combusting the concentrate. Aside from ruining flavor, you creating a hard black deposit that’s pretty much the same thing as the resin that builds up in a hand pipe. It’s nasty, difficult to clean and has no potential for reuse.
On the other hand, if you let the temperature drop too low, you’ll end up with un-vaporized concentrate that re-condenses in the joint and chamber(s) of your rig. This stuff is called reclaim, and it’s great to reuse for cooking or even dabbing a second time. If you’re interested in collecting your reclaim, read our piece on that in our dab reclaim blog. But, if you just want it out of your rig and aren’t interested in keeping it, read on!
How Do I Get it Out?
Here’s what you’ll need: hot water, coarse salt, q-tips, cotton balls, and 91% isopropyl alcohol. Some people suggest using acetone, but DO NOT DO THIS. Acetone does technically work better than isopropyl alcohol for getting the gunk out, but it’s hard on the nose, and may leave a residue in your rig. Not to mention that it’s extremely flammable, generally recognized as toxic through extended skin contact, and will strip any logos and paint off your pipe. Just don't do it.
Clean the Nail
This is hands down the easiest part of the process. If you have a titanium nail, be careful getting it out of the joint as the glass may have expanded around the nail and formed a seal between them. When this is the case, get out the torch and gently heat the base of the nail until you can turn and twist it out of the joint. DO NOT use your hands to handle the nail at any point in the process. Grab some tongs and grip the nail firmly from the top.
If grip is a concern, tightly wrap a rubber band around the top of the nail before heating (and be sure to remove it afterward). To clean, place the nail on a heat-safe surface (like tile or cement) and heat it until glowing red. This will carbonize whatever resin is on it, causing it to flake off. As it cools. you can carefully use a cotton swab or q-tip to wipe it down.
With ceramic or glass nails, as well as quartz dab nails, a light heating and swab with an alcohol-dipped bit of cotton or q-tip will do the trick. If you have trouble with stubborn buildup, sprinkle some salt on a q-tip to create better abrasion, and get out the elbow grease.Rinse the Rig
Rinsing the whole rig with hot water helps loosen and liquefy larger goopy deposits so that they can be flushed out with relative ease. This is particularly true of beaker-shaped rigs, where the open space at the bottom seems to invite chunky residue.
Just fill the rig up to the joint with warm water and place a cotton ball over the empty joint to stopper it. Swirl the water around a few times, and dump it out. Repeat as many times as it seems effective.Solvent Soak
While your rig is still warm from the rinse, fill to the joint with isopropyl alcohol. Wine corks can easily be cut to the size of your joint and used as a stopper. Give the piece a few swirls and let it soak for at least five minutes, or more if you’ve got some bad buildup.Shake ‘n Scrub
Make sure you’ve got enough air room in the rig to get a vigorous shake on, and add some coarse salt if you need some extra abrasive action. Shake it hard, let it sit for five minutes, and shake it again. At this point you can apply a q-tip or a soft pipe cleaner to any problem areas you can reach. Then give the rig a thorough rinse with warm water and let dry.Repeat
If you’ve really been slacking on keeping your dab rig clean, you may have to repeat this whole process a few times before things get back to their original gleam.
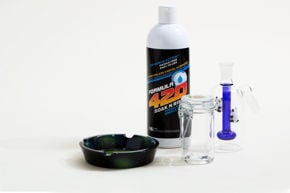
Of course, you can definitely make this easier on yourself by buying some dab rig cleaner specifically formulated to clean bongs and dab pipes. They can significantly cut down the time you spend doing deep cleans and shaking your rig around like a crazy person.
How Do I Keep My Rig Clean?
Obviously, prevention is the best prescription for a clean dab rig. Here are a few things you can do to reduce the rate of buildup in your rig.
Clean the nail every time:
Have a q-tip and some isopropyl at the ready each time you dab. Resin is a lot easier to get off when it’s fresh, so swabbing the nail immediately after it has cooled will be relatively easy.Change the water every time:
.
The water in your rig picks up resin particles every time you dab. Even if it still looks clean, it’s still depositing microscopic grossness on every interior surface it touches. Switch it out before each sesh!Alcohol rinse every now and again:
Every once in awhile, give your rig a preemptive swirl with isopropyl alcohol. This will remove some of the invisible buildup, and make it a little tougher for the next round of residue to stick.
Routine maintenance is annoying, but so is having to spend hours de-gunking a poorly cared-for dab rig. It’s tough to get in the habit, but once you do you’ll be enjoying clean and flavorful hits consistently. Happy dabbing!